Maintenance
Part of Silver surface decoration guide: chasing and engraving
Pattern layout, support, tool, strike, depth, and finish checklist
Silver pattern checklist for drawing control, stock, samples, support, hammers, punches, gravers, strike sequence, depth, distortion, finishing, and release.
What to take away
- Release the job only when the drawing, stock, sample, tools, support, process, and inspection record agree.
- Check tool condition and work position before judging design quality.
- Treat depth, reverse witness, flatness, and edge movement as separate limits.
- Stop at the first unexplained mark instead of carrying a fault across the pattern.
- Photograph both faces with scale and orientation before finishing changes the evidence.
Use this checklist as a hold-point record for hammer texture, decorative stamping, chasing, repousse, or hand engraving. Mark each item pass, fail, not applicable, or hold. A blank item is not a pass.
Drawing and job control
Drawing and Job Control
- Job ID matches drawing and traveler
- Alloy, batch, temper, thickness documented
- Pattern zone and trim allowance marked
- Datums fixed for start, center, corners
- Process matches intended metal action
- Correction and rejection limits written
- Article or job ID matches the drawing and traveler.
- Alloy, supplier, batch, form, temper, and thickness are documented.
- Finished dimensions and minimum section are stated.
- Pattern zone, protected zones, and trim allowance are marked.
- Start, center, end, corners, orientation, and repeat pitch have fixed datums.
- The process named on the drawing matches the intended metal action.
- Correction and rejection limits are written before work.
Sample approval
Sample Approval Checklist
- Coupon matches alloy, thickness, temper
- Support, tool, hammer, sequence match
- Face depth and edge definition meet design
- Reverse witness and released shape pass
- Labeled accepted sample at bench
- Failed samples identified for comparison
Tool and body-position gate
- Hammer face, head, handle, and attachment are sound.
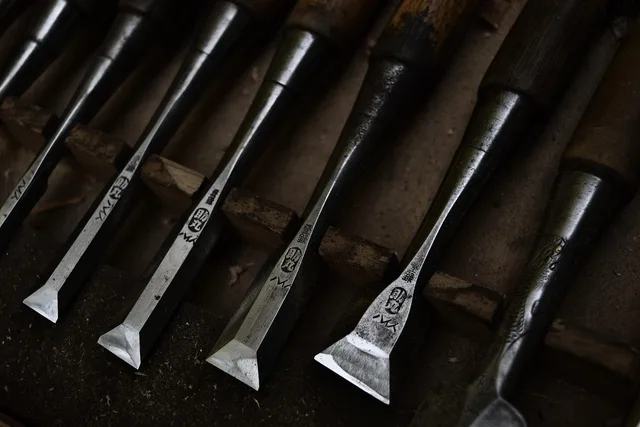
- Punch or stamp face is clean, identifiable, and undamaged.
- Struck end is not cracked, chipped, or mushroomed.
- Graver geometry and sharpness match the tested cut.
- Tool storage protects sharp edges and fine faces.
- Bench height permits a controlled view and neutral reach.
NIOSH's illustrated hand-tool ergonomics guide says to select a tool for its intended job and identifies hammers as striking tools and punches as struck tools. Its general handle guidance does not replace a jewelry shop's task-specific tool, force, or training decision.
Support and station gate
- Support material and contour match the accepted sample.
- Support surface is clean and free from raised debris.
- Work and support cannot slide during the action.
- Fingers and clamps remain outside the strike or cut path.
- Lighting reveals the tool face, datum, and surface relief.
- Backswing and chip-exit paths are clear.
- Required eye, hearing, hand, and body protection is in place.
- Pitch, resin, adhesive, or heated support controls are active where used.
First-action hold point
- Tool orientation is checked against the drawing.
- Dry registration matches the first coordinate.
- One tested action is made without rocking or chasing the result.
- Tool is lifted clear before inspection.
- Face location, depth, outline, and start or stop are acceptable.
- Reverse witness, flatness, and nearby construction zones pass.
Production sequence
- Anchor locations are completed before intermediate repeats.
- Operator follows the written order and turn direction.
- Orientation is reconfirmed after every work rotation.
- Short groups are checked before more marks are added.
- No weak impression receives an automatic second strike.
- Chasing and repousse stages follow the sample's side and support sequence.
- Engraved lines have controlled starts, stops, and chip exits.
CDC notes that striking or scraping can send metal slivers and other particles toward the eye and that protection must fit the work situation. Apply the shop's risk assessment; this checklist does not select eyewear for every operation.
Depth and distortion check
| Feature | Recorded result | Status |
|---|---|---|
| Motif center error | ||
| Depth range | ||
| Reverse witness | ||
| Panel flatness or form | ||
| Minimum thickness | ||
| Edge offset | ||
| Burr or torn-edge limit |
- Measurements use named instruments and datums.
- Released shape is checked after the support is removed.
- Both faces are photographed under consistent raking light.
Finish and release
- Finishing method and material-removal allowance are approved.
- Finish does not erase required tool evidence, marks, or dimensions.
- Residue is removed from recesses and the reverse.
- Final pattern, surface, dimensions, and construction zones pass.
- Tool IDs, sample ID, sequence, results, deviations, and disposition are recorded.
- Failed or held work is physically segregated.
Common questions
Is a visual check enough for depth?
No. Use the accepted sample and the measurement or profile method stated by the job.
When should flatness be checked?
At the sample stage, after early actions, during production, and after the work is released from support.
Can a mushroomed punch be used for one last mark?
No. Remove an unsafe or damaged tool from service under the shop procedure.
What if the checklist does not fit a curved object?
Add form-specific support, datum, access, and released-shape controls before work. Do not mark irrelevant items as passed.