Guides
Silver surface decoration guide: chasing and engraving
Silver surface decoration guide for chasing, repoussé and engraving: prove tools on matching coupons, choose supports, sequence strikes and inspect the reverse.
This silver surface decoration guide covers the mechanical processes, chasing, repoussé and engraving, and how to control them at the bench: matching tools and supports to the work, testing on coupons, sequencing operations, and inspecting the finished piece. It gives a method for finding your own limits on coupons rather than fixed figures, because depth, strike count and tool angle depend on the alloy, thickness and temper in front of you.
The repertoire here is small and specific. Chasing and repoussé displace metal from the front and the reverse; engraving and bright-cutting cut a chip free; and matting and stippling texture a ground. Etching, patination, plating, vermeil and enamelling are chemical or applied processes with their own baths, firing and safety controls, so they sit outside this guide.
What to take away
- Read the decoration family firstchasing, repoussé, engraving, bright-cutting, matting or stippling.
- Name the metal behaviour firstcompression, displacement, raising or removal. The tool follows from that.
- Prove every stamp, punch and graver on a coupon of the same alloy, thickness and temper as the work.
- Treat layout, support, tool angle, strike order and depth as five separate variables, and set the limit for each on a coupon.
- Inspect the reverse, edges and critical dimensions, not just the decorated face.
- Stop for tearing, buckling, doubled impressions, unstable support or a lost dimension.
Repoussé and metal movement
Four ways silver moves
Hammered texture
- Metal action
- Compresses surface
- Back evidence
- Compressed face
- Main risk
- Uneven field
Struck stamp
- Metal action
- Displaces sideways
- Back evidence
- Sideways witness
- Main risk
- Rotation, double strike
Chasing
- Metal action
- Pushes along face
- Back evidence
- Walked line
- Main risk
- Uneven line, thinning
Engraving
- Metal action
- Cuts chip, burr
- Back evidence
- Burr, chip exit
- Main risk
- Slip, burr, depth
Repousse raises relief by working the reverse. Each process leaves different geometry and different evidence on the back of the sheet.
Before choosing a tool, write down the surface zone, depth range, orientation, border and the areas that must stay clean. A drawing that does not say which of the four actions applies will be resolved at the bench by guesswork.
Chasing punches and gravers by name
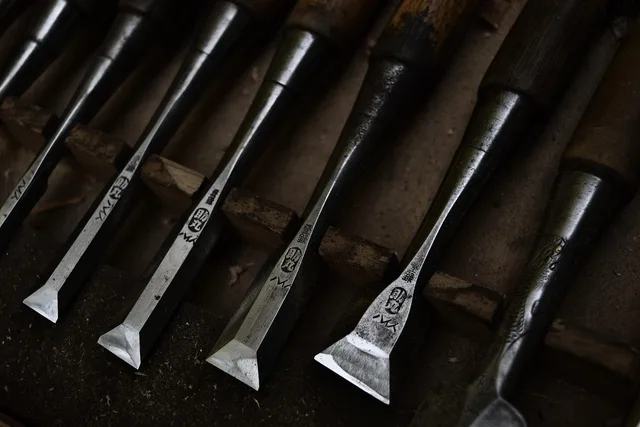
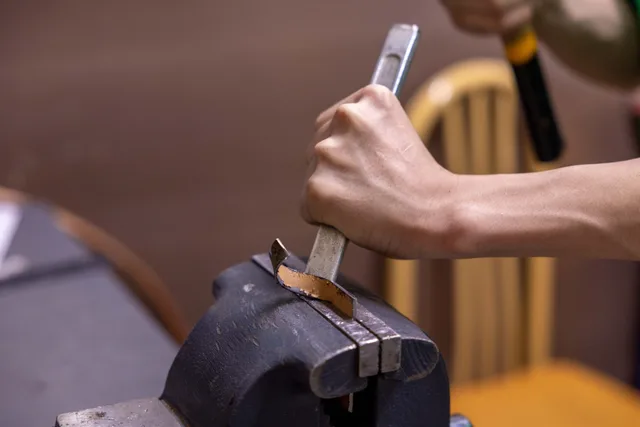
A liner punch lays a line without cutting. A planisher flattens and smooths displaced metal. A matting punch textures the ground around raised work, and an embossing punch raises broad relief from the reverse. The chasing hammer is light and round-faced, and it strikes the punch rather than the metal.
Engraving profiles divide by job as well: onglette for curved outlines, flat for wide bright cuts, square for fine lines, corners and shoulders.
Read the drawing as metal movement
Work from a full-size drawing. Mark construction boundaries, solder zones, stone seats, and edges. Mark bends, hallmark positions, and trimming allowance.
Then give every line or field one job.
Design element to metal action
Design element
- Allover hammer texture
- Repeated face contact
- Single motif
- One registered stamp
- Repeated border
- Indexed stamp sequence
- Chased contour
- Punch walked along face
- Repousse relief
- Raised from reverse
- Engraved line
- Graver lifts a chip
Action on metal
- Allover hammer texture
- Uneven field, distorted sheet
- Single motif
- Rotation, double strike, excess depth
- Repeated border
- Spacing drift across the run
- Chased contour
- Uneven line, local thinning
- Repousse relief
- Stretching, tearing, lost support
- Engraved line
- Slip, burr, excess depth
Main risk
- Allover hammer texture
- Single motif
- Repeated border
- Chased contour
- Repousse relief
- Engraved line
Do not call every hammered mark engraving. The Victoria and Albert Museum's account of its silver interpretation project says its films separate engraving, chasing and embossing so viewers can see and hear the difference. Useful for the distinction, not a procedure for your alloy, pitch, punch or graver.
Build a sample system
Cut coupons from the same alloy, thickness, temper and surface preparation as the work. Record the tool ID and a sketch of its face. Note the support material and its thickness. Note the hammer weight or hand pressure, the tool angle, and the strike count.
Photograph the face and the reverse. Measure depth and any distortion. Keep the failures. A coupon that tore at three strikes tells you where the boundary sits.
A clean impression on thicker copper proves nothing about thin sterling silver. The alloy work-hardens at a different rate and the sheet has less metal to displace.
Alloy designation decides the coupon as much as thickness does. Fine silver is 999, sterling is 925, and Britannia silver is 958. Silver items are sometimes marked 925, which means 925 parts per thousand are pure silver; the copper in the balance is what makes sterling work-harden sooner and tear faster than fine silver under the same punch.
Match the support to the process
A flat steel block resists movement and gives a crisp struck impression. It also sends shock back through the work and leaves the reverse exposed.
Wood, leather, urethane, sandbags and pitch each yield differently. Chasing and repousse usually need a support that holds the piece while allowing planned displacement.
Block the support so it cannot slide. Keep hands out of the strike path and wear task-specific eye protection. Pitch, resins and heated supports carry their own temperature, fume and skin-contact controls; follow the manufacturer's safety data sheet supplied with that specific pitch or resin, along with your local fire and air-quality requirements, rather than a general bench rule.
Set the sequence from fixed datums
For a repeating border, mark start, centre, end and corner positions before filling the gaps. Drift is cumulative, so an error at the third strike shows up at the twentieth.
Sequence from fixed datums
- Mark start, centre, end, corners
- Fill gaps after datums
- Rough in main chased lines
- Raise broad repousse volumes
- Chase the front
- Rehearse engraving start, stop, chip exit
Rough in the main chased lines before adding fine detail. Raise broad repousse volumes before chasing the front. For engraving, rehearse the start, stop and chip exit on a coupon first.
Never fix a weak mark with an unplanned second blow. Ask whether the tool can be registered exactly, and whether another strike would exceed the depth or distort the reverse. Sometimes the right call is to leave a small variation alone.
Inspect the whole object
Use raking light and magnification. Check starts, stops, joins, burrs, torn edges and doubled profiles. Look at the reverse for raised witness marks and support contamination.
Recheck flatness, curvature, opening, wall thickness and nearby joints after every substantial stage, before the next one starts. A pattern that moved during forming is cheaper to correct early.
Keep a batch record: tool, support, sequence, coupon, measurements and corrections. Photograph the finished piece with a scale and a marked orientation.
One part of the object is not decoration at all: the mark. Under the National Stamping Act and the FTC's Jewelry Guides, a US silver piece marked solid silver, sterling silver, sterling or ster. must meet the sterling standard, and it must also carry the name or US registered trademark of the company behind it. Chasing, engraving or heavy polishing across a stamp can make it unreadable, and an unreadable mark is a defect, not a finish.
Common questions
Is chasing the same as engraving?
No. Chasing displaces the surface with punches and moves metal rather than removing it. Engraving cuts a chip free with a graver, which leaves a burr and a bright cut.
Can one test strike set the force for a production run?
Only if the coupon matches the work and the result meets your depth, reverse and dimension limits. Repeatability still has to be checked across the run, because silver work-hardens as you go.
Should decoration happen before or after forming?
It depends on the process and the design. Later forming can stretch or rotate a pattern, while decorating a finished form can make support awkward. Decide from the coupon, not the drawing.
Can polishing hide a bad stamp?
Polishing softens edges, but it also removes metal, and a doubled or drifting impression stays doubled or drifting. Tripoli on a stitched cotton buff, then rouge on a softer buff, will round a fine bright cut and blur an edge; neither compound will straighten a doubled profile. Diagnose the strike before you reach for the buff.
In this guide
- Laying out and stamping a repeat pattern on silver: coupon method and inspectionUse drawn datums, matching coupons and a divided strike sequence to lay out and stamp a repeat pattern on silver, then check depth, reverse witness and flatness.
- Silver decoration methods compared: hammer texture, stamping, chasing and engravingSilver decoration methods compared by metal movement, tools, support, depth, repeatability, correction limits, surface effects, and suitable design work.
- Pattern layout, support, tool, strike, depth, and finish checklistSilver pattern checklist for drawing control, stock, samples, support, hammers, punches, gravers, strike sequence, depth, distortion, finishing, and release.
- Silver stamping problems: double strikes, drifting patterns and uneven depthSilver stamping problems guide for double strikes, drifting patterns, torn edges, distorted sheet, uneven depth, evidence checks, controlled trials, and rejection.
- Repair Misaligned Stamped Silver Border: Fictional ScenarioA fictional scenario treats “repair misaligned stamped silver border” as a craft problem, tracing drift, a corner redesign, and release checks.